Card terminals at the till
With a card reader linked to the till, the cashier no longer types the card amount into a separate terminal. The till sends the amount to the reader, the customer taps or inserts the card, and the sale completes by itself when the payment is approved. The amount can never be mistyped, and a card payment can never be counted twice.
Infotech POS works with:
| Reader | What it is |
|---|---|
| Nearpay card reader | Tap to pay on an Android phone: a paired till or waiter phone running the Infotech app |
| Stripe card reader | A Stripe smart reader (WisePOS E, S700) in the branch, for countries Stripe supports |
| Separate terminal | Any bank terminal. The cashier charges it and confirms the payment at the till (no link) |
| Simulated reader | For testing and demos only: approves without a card |
Step 1: The platform administrator switches the reader on
Nearpay and Stripe Terminal are switched on for the whole installation by the super administrator. Until then, shops see "Not available: … is switched off on this platform".
Nearpay (super admin console › Nearpay):
- Turn on Nearpay is on and choose the Environment: Production (real cards, real money) or Sandbox.
- Pick the Account type (Client dashboard (client UUID) or Merchant dashboard (merchant UUID)) and enter the UUID from Nearpay dashboard › Credentials.
- Choose the Country, enter the Google Cloud project number (the app's Play Integrity project, required by Nearpay) and, only for Huawei devices, the Huawei Safety Detect key.
- Upload the Private key (pos_key.pem) from the Nearpay dashboard. It is stored encrypted and never shown again. Choose Save.
- Under Terminals of each shop, pick the Shop, enter the Terminal ID (TID) and a Name, and choose Add terminal. A terminal belongs to one shop only. Switch off stops it without removing it.
Stripe Terminal (super admin console › Stripe Terminal):
- Turn on Stripe Terminal is on and pick the Mode: Live (a
sk_live_key) or Test (ask_test_key, simulated readers and test cards). - Enter the Secret key (it is tried on Stripe before it is kept) and the Default location (
tml_…). Choose Save. - Under Readers of each shop, pick the Shop and Branch. Add by the Registration code the reader shows, or an Existing reader id. Give it a Name (for example "Counter 1"), optionally a Location and the Shop's Stripe account (
acct_…, Stripe Connect: the shop's own account receives the money). Choose Add reader.
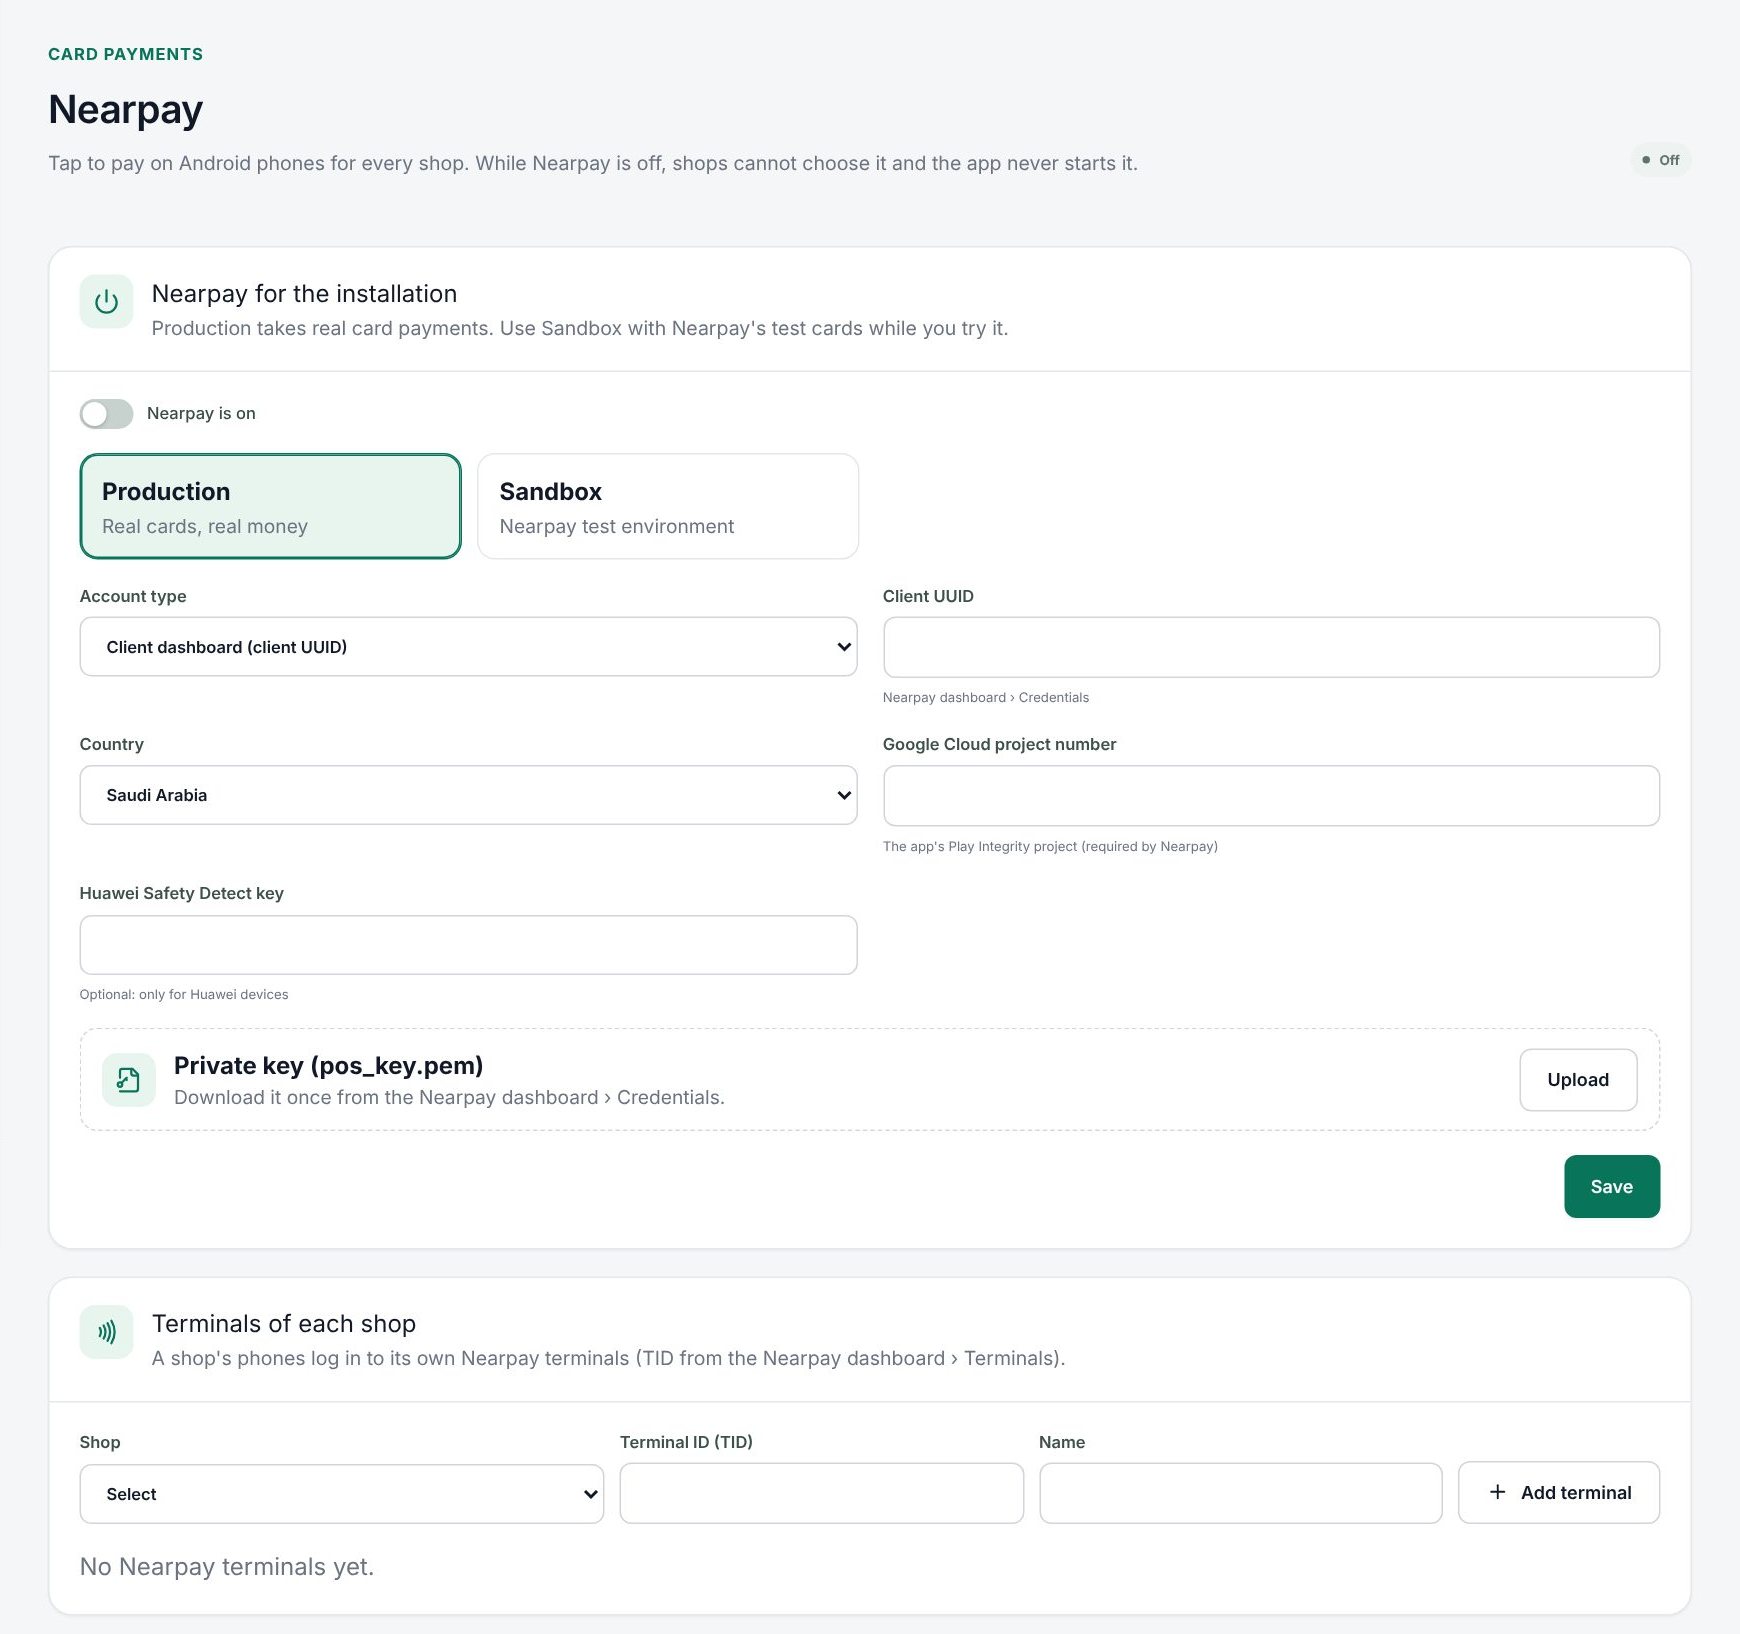 The Nearpay settings in the super admin console
Step 2: The shop links a payment method
- Open Settings › Payment methods and edit your card method (or Add payment method).
- Under Payment type choose Card terminal.
- Below the type, choose how the card is charged: Separate terminal, Nearpay card reader, Stripe card reader or Simulated reader. A reader the platform has not switched on shows "Not available: … is switched off on this platform". Save.
For Nearpay, also pair the Android phone as a Till or Waiter phone (see Devices, pairing and staff PINs), open the Infotech app on it and turn on More › Card reader. A Stripe reader is ready once the administrator has added it to your branch.
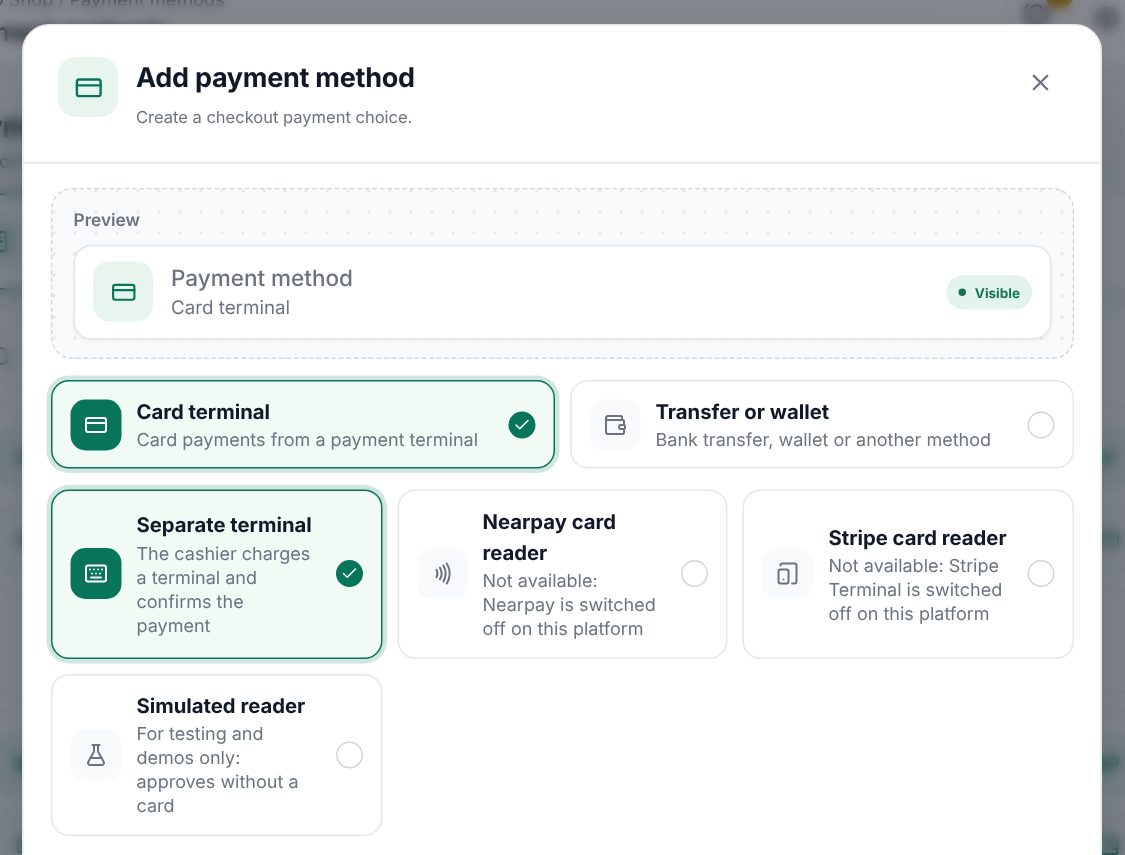 The payment method editor with the ways a card can be charged
Take a card payment
- Ring up the order and open the payment window. A linked method shows On the card reader.
- Choose the card method. The main button becomes Charge card.
- Under Send to, pick the reader. Each one shows Online or Offline. Choose Send to reader.
- The till shows Waiting for the reader to open the payment…, then Ask the customer to tap or insert the card.
- When the card is Approved, the payment is locked in and the sale completes.
If the card is Declined, Cancelled, The reader did not answer or The payment failed, choose Try again or another method. Stop waiting cancels the request.
Refunds and leftovers
- Returns: a card sale's money goes back with Refund on the card and Send refund. On Nearpay the customer taps again; Stripe refunds need no tap.
- Give back: on a payment already charged in the payment window, gives it back on the card.
- If you close the payment window after the card was charged, the till warns "The card was charged …" with Back to payment or Keep and close. A kept payment appears next time under Card payments approved but not used by a sale, with Use for this sale or Give back.
Good to know:
- Card readers need a connection.
- A request no reader starts within 2 minutes runs out and can never be charged. A Stripe payment still being read after 5 minutes is stopped.
- An approved payment pays one sale only, and a refund never gives back more than was taken.
- If a table's order is paid on another screen (a waiter's phone, QR payment, another till), the open till shows Paid on another screen and closes the order by itself.
Examples
A café with Nearpay. The waiter's paired Android phone has Card reader on. At the till the cashier picks Mada (Nearpay), chooses Charge card, sends it to "Waiter phone 2", and the waiter takes the phone to the table. The customer taps; the till shows Approved and prints the receipt.
A shop testing Stripe. The administrator turns Stripe Terminal on in Test mode. The till shows Test mode: present a test card. After trying a few sales, the administrator switches to Live with the live key.
Related: Taking payment, Payment methods, Returns and credit notes, The super-admin console.
Last updated 17 Oct 2026