Students
The Students page is the school's register of every child: who they are, their guardians, which class and section they sit in this year, their documents and their history. Everything else (attendance, exams, fees, ID cards, certificates) works from these records, so it is worth keeping them right.
Open Students › Students. You need the student:read permission to see the page. By default the Owner, Principal, Office admin, Admission officer and Accountant roles can see students; the first four can also add and change them (student:write). Teachers do not have this page by default. See Users and roles.
Before you start
- Start an academic year and add its classes and sections in Classes and subjects. Without an active year you cannot put a student in a section.
- Add any extra fields your school wants (for example transport or previous GPA) in Student fields. They appear under More information on every student.
- Have many students already in Excel? Use ID cards and Excel import instead of typing them one by one.
The student list
The header says, for example, "412 active students in 2026". Above the list are tiles you can click: Active students, Boys, Girls, Not in a section and Free seats (the seats left in all sections of the year).
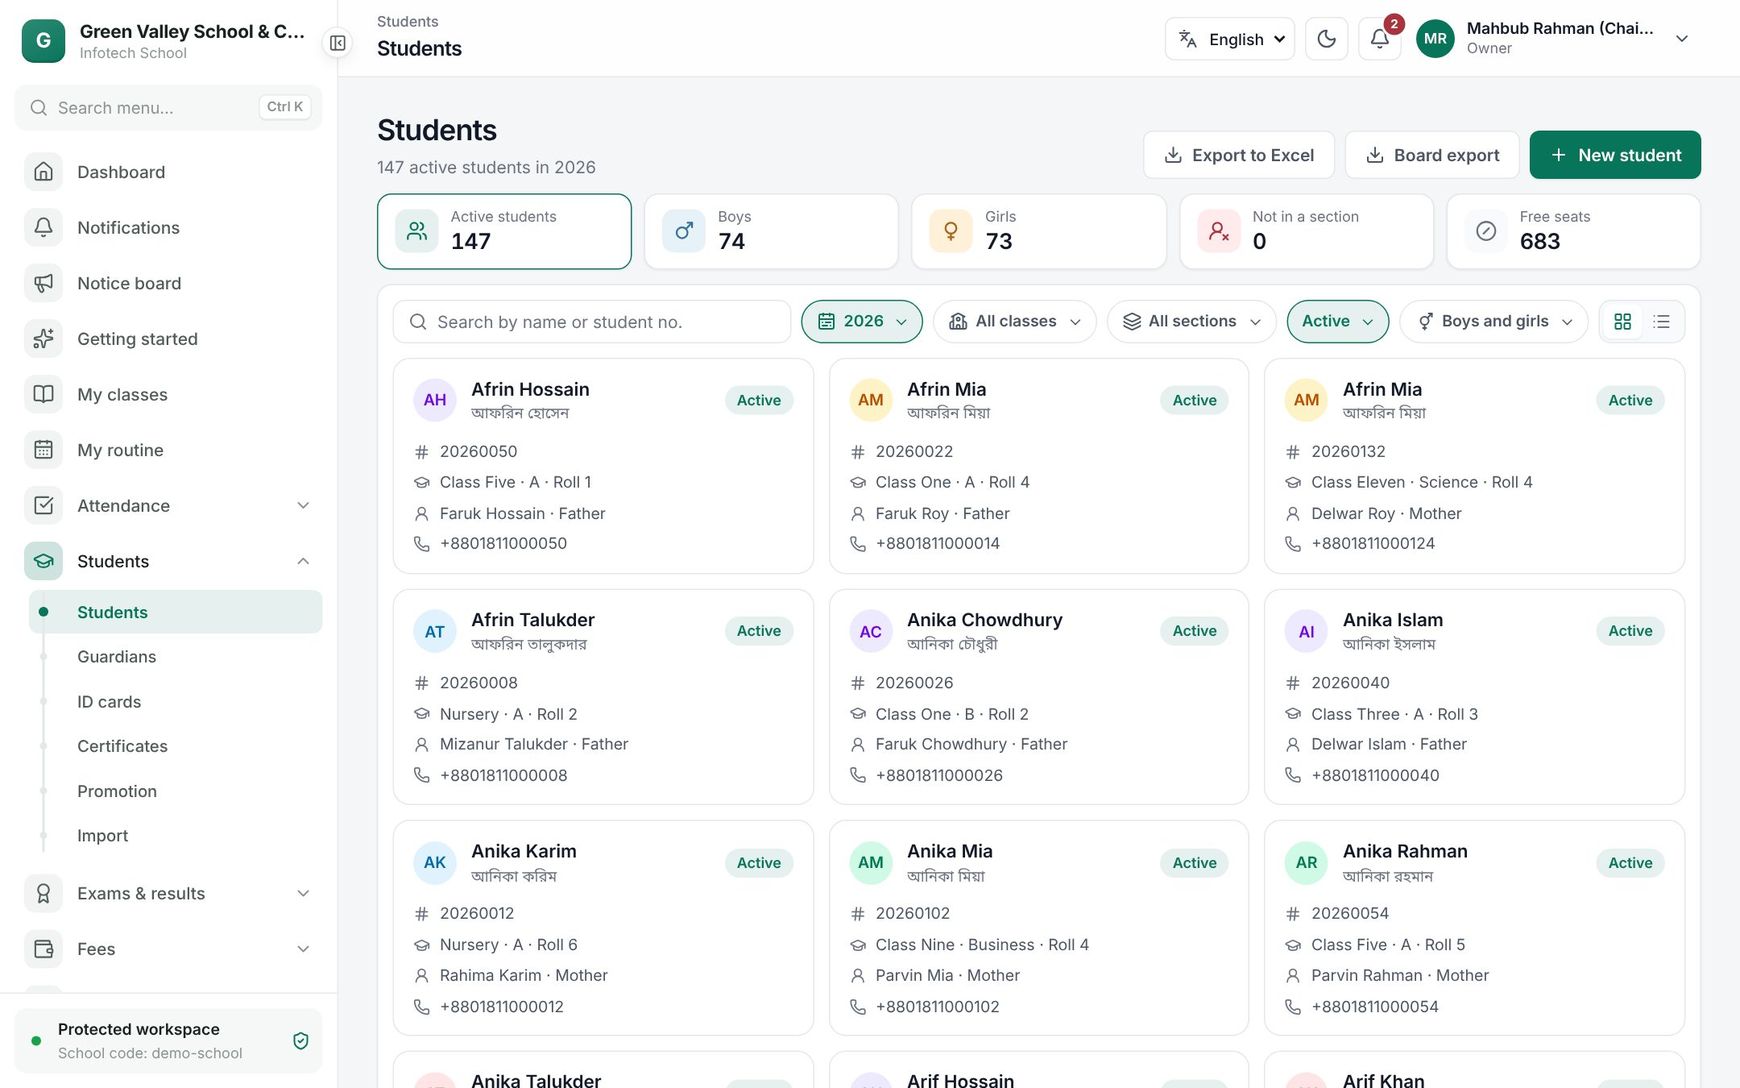 The student list with the tiles and filters
Search by name or student number, and narrow the list with Year, Class, Section, Status (Any status shows everyone, including students who left) and Gender. Switch between cards and a table; the table shows Student, Class, Guardian and Status. Click a student to open their record.
Two downloads sit at the top:
| Button | What you get |
|---|---|
| Export to Excel | The active students of the chosen class or section: number, names, date of birth, gender, religion, blood group, class, section, group, shift, version, roll, main guardian and address. No birth registration or health notes. |
| Board export | For board registration forms: names in English and Bangla, father's and mother's names, date of birth, birth registration number, gender, religion, class, group, section, roll and guardian's mobile. Choose a class or section first. Only people who may see sensitive data get this button. |
Both downloads are recorded in the audit log.
Admit a new student
- Choose New student.
- Under Student, fill in Name (English) as on the birth certificate, then Name (Bangla), Date of birth, Gender, Religion, Blood group and Nationality (a two-letter code such as BD). Student's mobile (optional) lets the student sign in to the app later.
- Under Address and previous school: Present address, Permanent address, Previous school, Admission date and Quota (for example freedom fighter's child).
- Fill in your school's own fields under More information.
- Under Guardians, type the guardian's Mobile number first. If that number is already in the school, you see "Rahima Begum is already a guardian here (1 child)" and can choose Link, so brothers and sisters share one guardian. Otherwise fill in Guardian's name, Relation and the rest. Use Add guardian for a second one (up to four). Mark one as Main contact; switch May pick up on for everyone allowed to take the child home.
- Under Class and roll, choose the Section of the current year, or Enroll later. Leave Roll number empty to take the next free number.
- Under Private information, add the Birth registration no. (17 digits) and any Health notes.
- Choose Admit student. You see "Arif Hossain was admitted with student no. 20260001".
The student number is made from the year and a running number. The save is refused when the plan's student limit is reached, the birth registration number is already used by another student, the roll number is taken, or the section is full.
The student's record
The top of the record shows the photo (click it to change; JPEG, PNG or WebP under 2 MB), the status, the student number, class and roll, and the class teacher. Four tabs follow:
| Tab | What you do there |
|---|---|
| Profile | Change the details and choose Save changes. Brothers and sisters lists students who share a guardian. |
| Guardians | Add, edit or remove guardians and give them a sign-in. See Guardians. |
| Class | See the current class, section, roll, shift and version, and class teacher. Enroll a student who is in no section, or Move to another section (for example from A to B). Class history shows earlier classes. |
| Documents | Keep the birth certificate, transfer certificate, mark sheets, photo, medical record and other papers. Choose the Kind, add a Note (optional) and drop a PDF, image or Word file up to 10 MB. |
If the student has their own mobile number, Create sign-in lets them sign in to the app with an SMS code. This needs the user:write permission too.
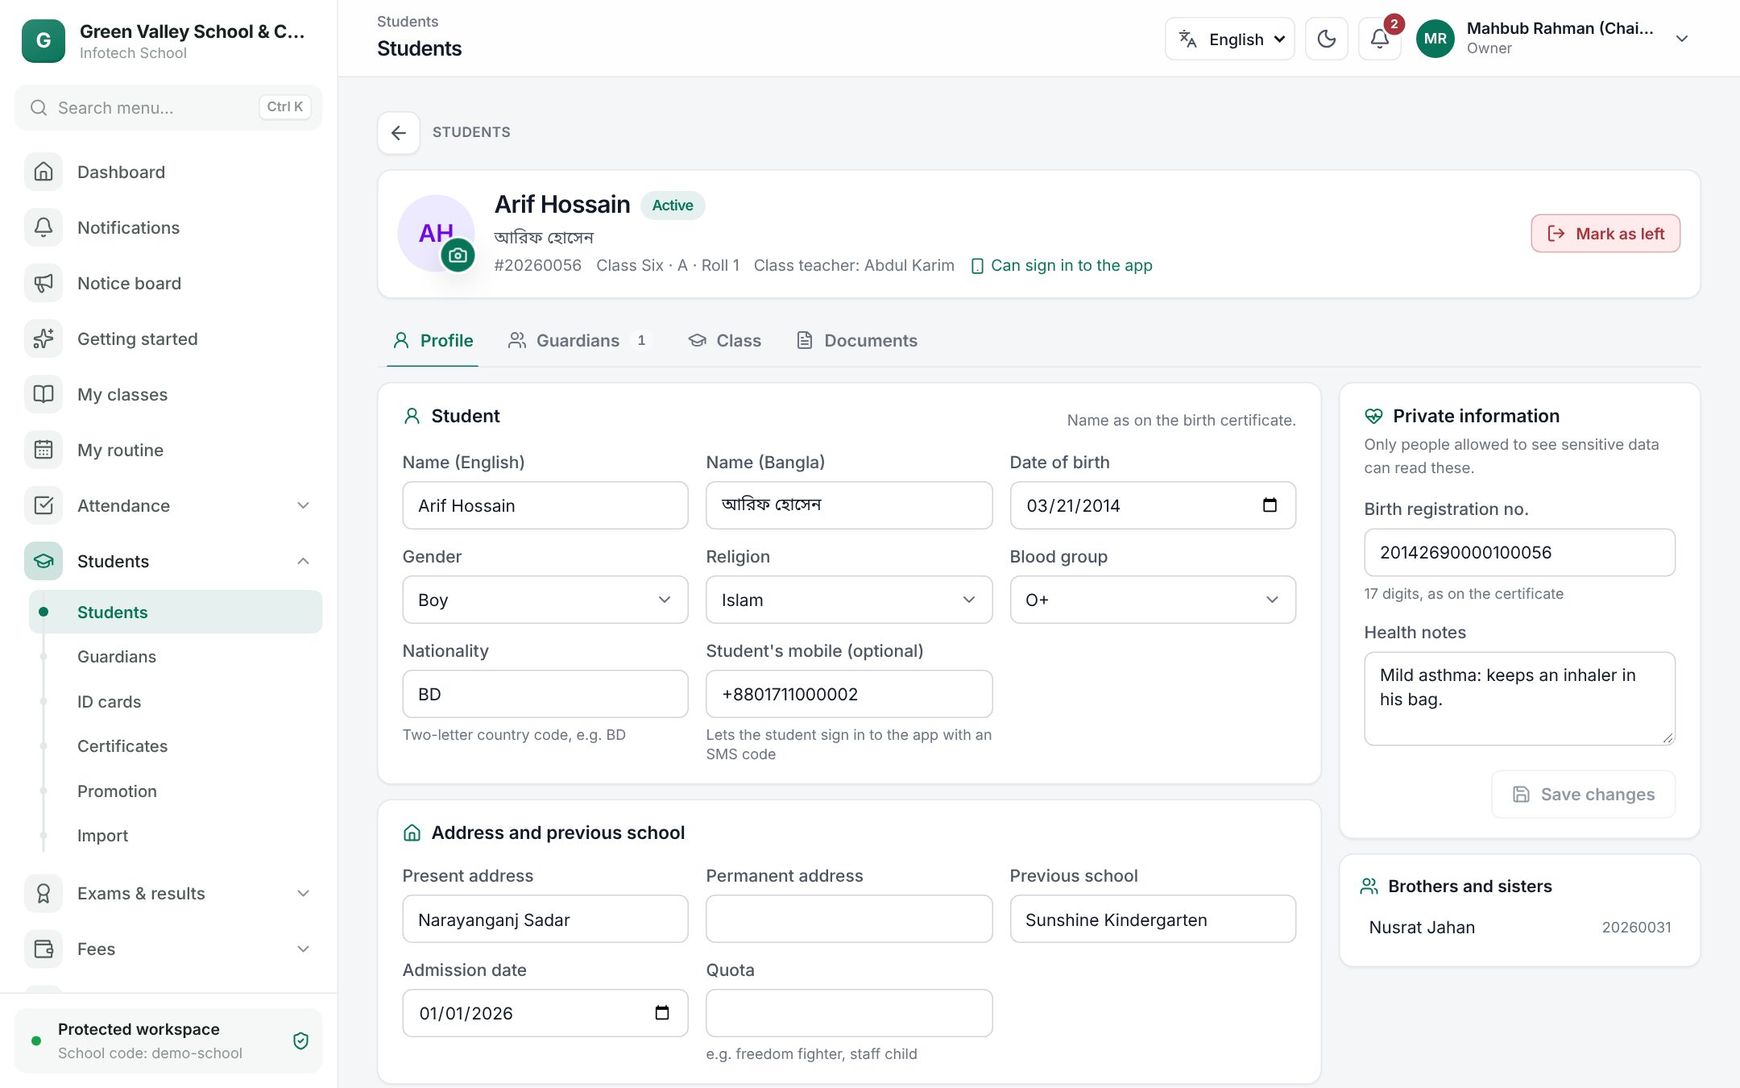 A student's record with its tabs
Status changes
| Status | Meaning |
|---|---|
| Active | Studying at the school now |
| Left | Left the school |
| Transferred | Moved to another school (also set when you issue a transfer certificate) |
| Graduated | Finished the last class (also set by Promotion) |
Choose Mark as left, pick the Status, the Date and a Reason (optional), and confirm. This year's enrollment ends; the record and history stay. To bring a student back, choose Re-admit: they become Active again (this counts toward the plan's student limit), and you enroll them in a section afterwards.
Sensitive fields
The birth registration number, health notes and guardians' NID are sensitive. Only people with the student:sensitive permission (by default the Owner and Principal) can see and change them. Everyone else sees "Hidden: your role cannot see sensitive data."
Examples
A new admission in January. Arif Hossain joins Class Six A. The office types his mother's number, 01711000001, and the form finds Rahima Begum, who already has a daughter in Class Two. They choose Link, leave the roll empty and get roll 31, the next free number.
A student moves away. Nusrat's family moves to Chattogram. The principal issues her a transfer certificate from Certificates; her status becomes Transferred and her class history and documents stay on file.
Last updated 30 Oct 2026